There’s part of me that wants to pretend that there’s nothing unusual about falling off the face of the blogging world for over six months and then casually popping in for another post like I’m right on schedule. Not that I ever actually had a schedule going around here, but I was rather consistent about posting once a month…or so.
The other side of me wants to make a BIG deal out of this. Hey WORLD!!! I’m BACK!!! And look what I brought ya!!!!
That, I tell myself, sounds rather obnoxious though, so I won’t. You’re welcome.
It’s been six months of significant season change, from a lovely autumn, a fairly mild winter (that is, on the days when it wasn’t snowing or icing), a spring of rain, storms, and more rain, to another hot, hot summer. Tell me, how does the ground go from oozing water like a soaked sponge, to cracking from dry heat in less than a week???
My life has been considerably less drastic.
 I bought a new cutting board! Yeah, not much to say here…
Actually, you want to know what I haven’t talked about since this post in August of 2013?? My braces! Well, they are off now folks, as of September 2014. It wasn’t as thrilling as I was hoping since the adult canine died, but hey, it’s where it’s supposed to be now and seems sturdy enough. I don’t even have to wear that horrendous retainer! As far as I’m concerned, I can happily forget the whole thing happened. I’m sure you were dying to know the rest of the braces saga, so there you have it!
So, in spite of the fact that I haven’t posted since 2014, I do still cook…just as much as ever, as my Instagram can attest. (You can pretty much blame that app for the seemingly imminent demise of my blog.) What brings me back, you ask?
Well, it’s this…
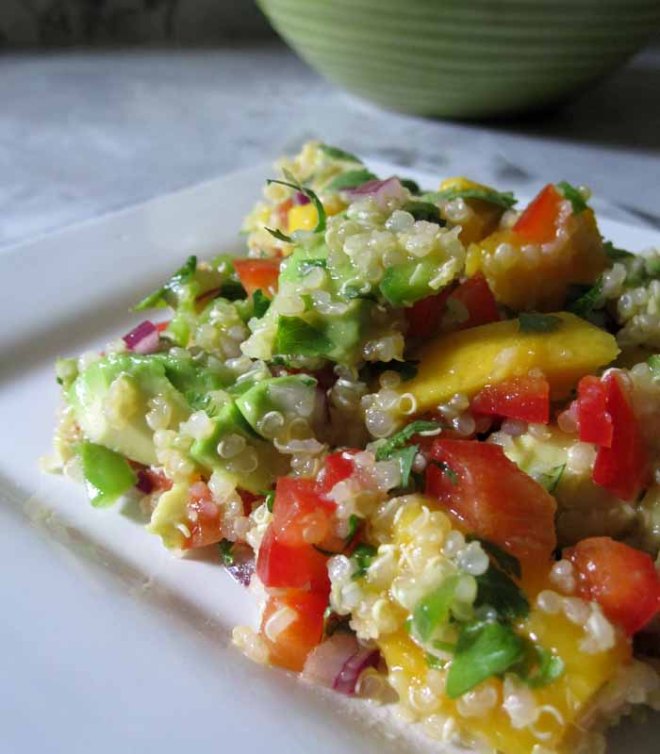
I made it for a party, innocently enough, and…well, people just got addicted. Every other person wanted the recipe and I scolded myself for not having blogged it already so I could just pass out my blog address rather than racking my brain trying to remember what I actually put in it. Yep, I’ve returned to the old habit of not making notes while I cook (and creating run on sentences that you can barely get through without stopping for breath!). Oops!
I made it again today because I think my original taste testers have pretty good taste when it comes to good food. I’m pretty sure, if they liked it, than you will too.
And let me tell ya’, this is a salad for summer! Sweet, spicy, refreshing, light and yet filling. Okay, I hear you, I’ll stop the wordage already and get with the recipe!
Mango Avocado Quinoa Salad
- 1 c. quinoa
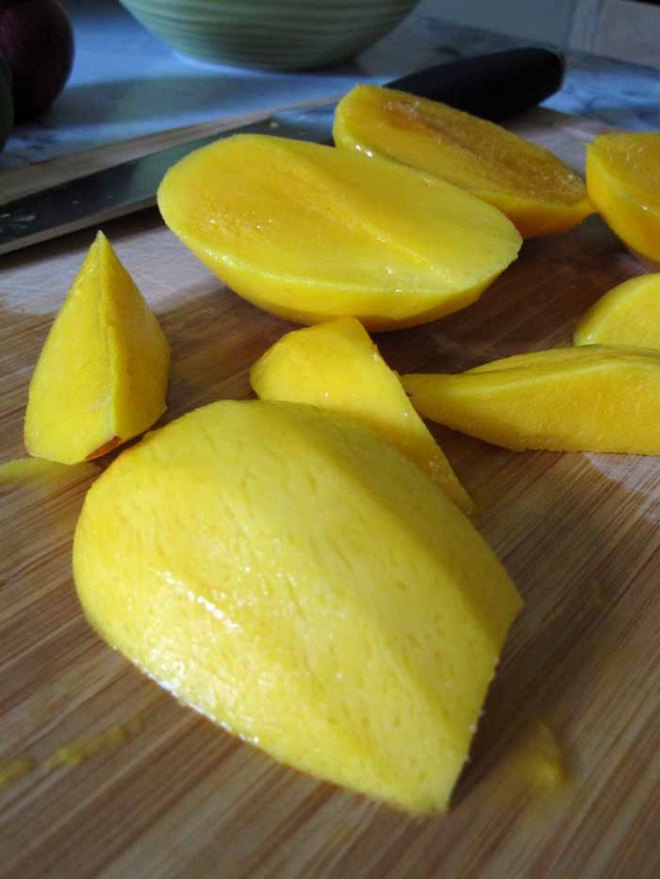
- 2 mangos, peeled and cubed
- 1 red pepper, diced
- 1/4 red onion, diced
- 1 jalapeno, cored, diced
- 1/2 bunch cilantro, chopped
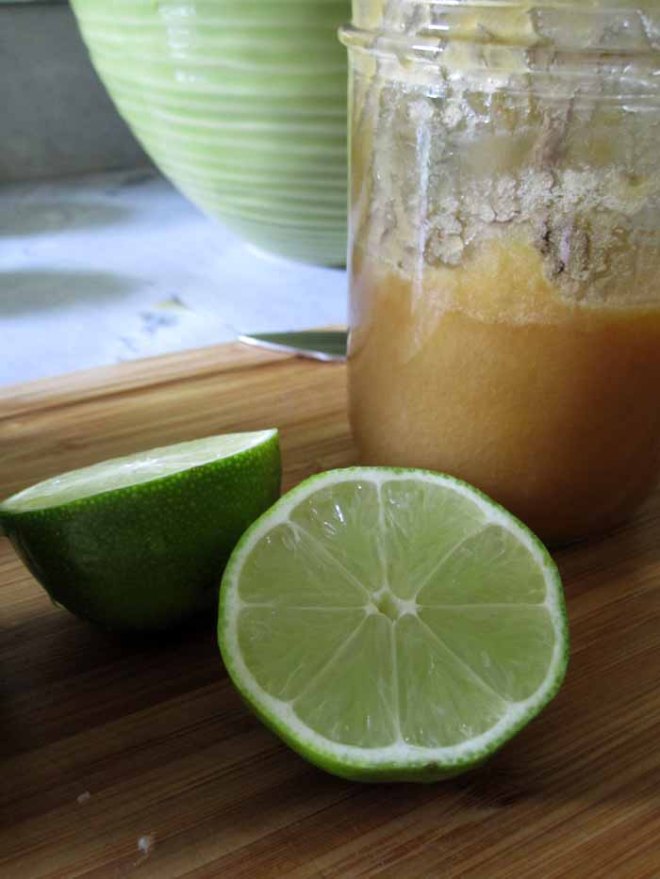
- juice of 2 limes
- 1/2 t. minced garlic
- 1 t. honey
- 2 T. sesame oil, or other mild flavored oil (not toasted sesame)
- 1/4 t. red pepper flakes
- salt and pepper to taste
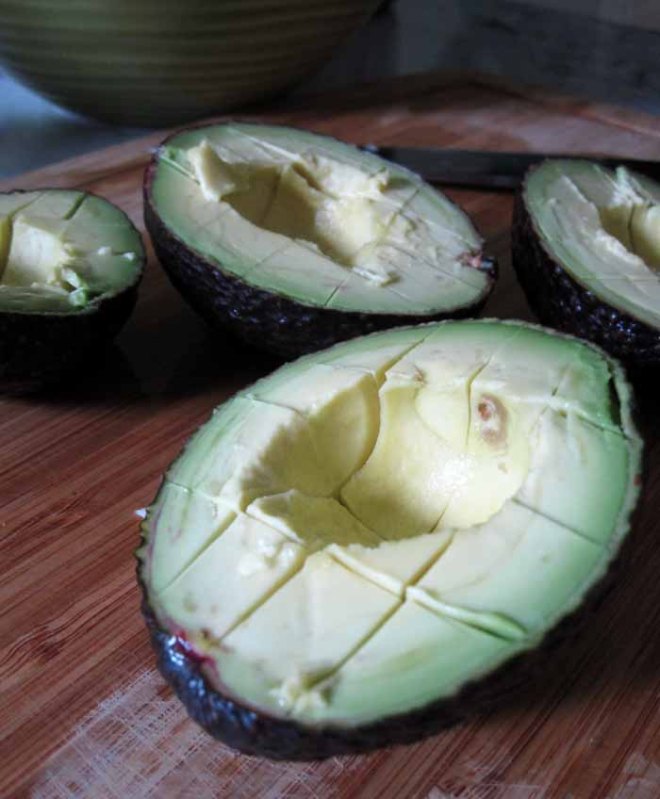
- 2 avocados, peeled, seeded and cubed
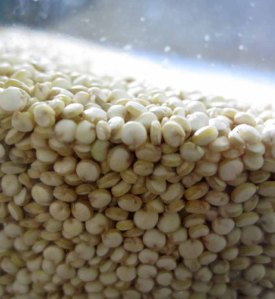 Rinse quinoa. Drain, then add enough water to the pan to cover the quinoa by about an inch. I use the first joint on my index finger to measure from the top of the grain, because I dislike measuring liquid for grains. Weird, I know.
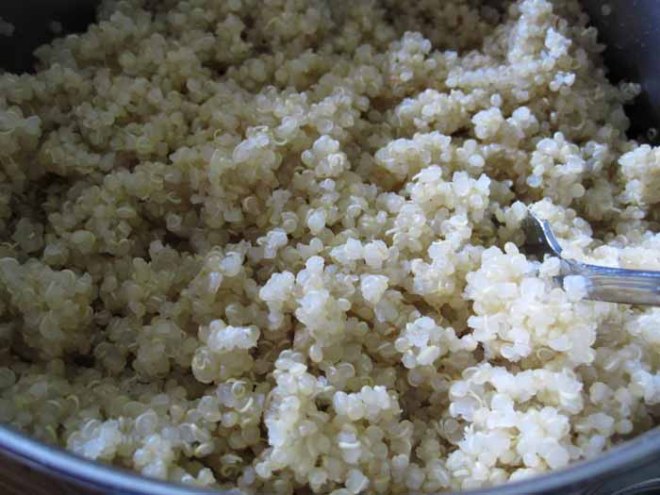
Bring to a boil, cover with a lid and lower heat to a simmer. Cook 15-20 minutes or until all the water is cooked out. Remove from heat. Let cool to room temp (or refrigerate for later use) and fluff with a fork.
This slideshow requires JavaScript.
Peel mangos and cut into bite-sized pieces.
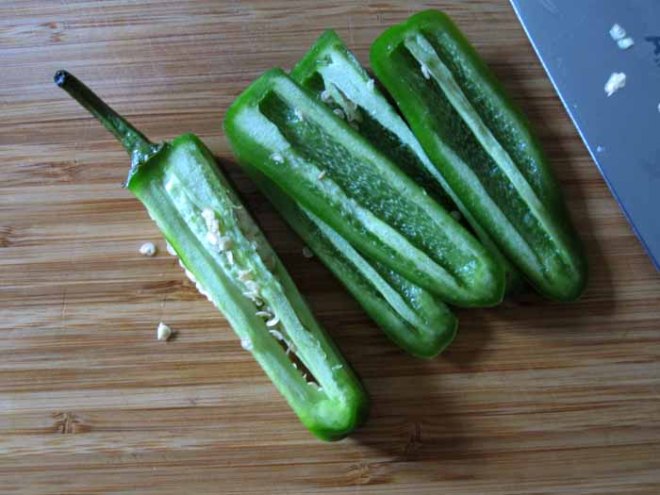
 Dice the red pepper, purple onion (Can we just come to terms with the fact that this variety of onion is not red and should not be called red?), and the jalapeno. This is my favorite way to de-core a pepper…
 Chop cilantro and add to prepared ingredients. Let’s just stop and relish the colors for a moment, shall we?
 Purple, that onion is totally purple.
Mix the juice of the limes, honey, red pepper flakes, oil, and garlic in a jar or cup and pour over ingredients.
 Add cooled quinoa to bowl and toss lightly. The avocados should go in at the last minute…or at least a couple hours before.
 Salt and pepper to taste. Please don’t over stir! Once the avocado is added, you want to mix as little as possible so it doesn’t just mush together.
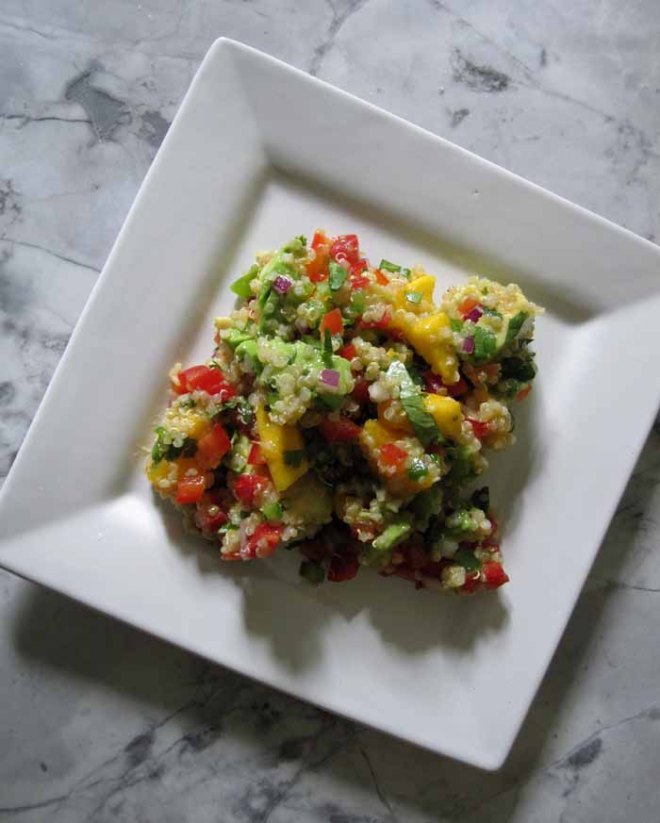 Enjoy as a side for grilled chicken, or eat it as a meal all on it’s own!
Before the next mouth watering photo, I would like to take this moment to thank each and every one of you. Thank you to my loyal readers who have stayed with me even though I ditch you for 6 months at a time. And thank you to my new visitors for getting this far in reading this post! Welcome and I hope you enjoy what you find here on Stir it Up!!


